⚡Kick things off by diving into your Aruba Instant-on dashboard☁️ .
Ensure all APs intended for the Captive WiFi network are recognized and onboarded here.
Update as of 1st September 2025 the latest HPE Aruba has changed, you need to create a re
- Next, head over to the 'networks' section and pinpoint the network you want to activate our service on.
- Label it with a name ie: _My Restaurant FREE WiFi (this format will bring your WiFi to the top of the list to make it easier for customers to find)
- Configure the security setting to 'Guest Portal'. Once done, an option to 'Customize guest portal' will pop up.
- Click 'view guest portal', input these specifics
- Type: External
- Please see the settings below
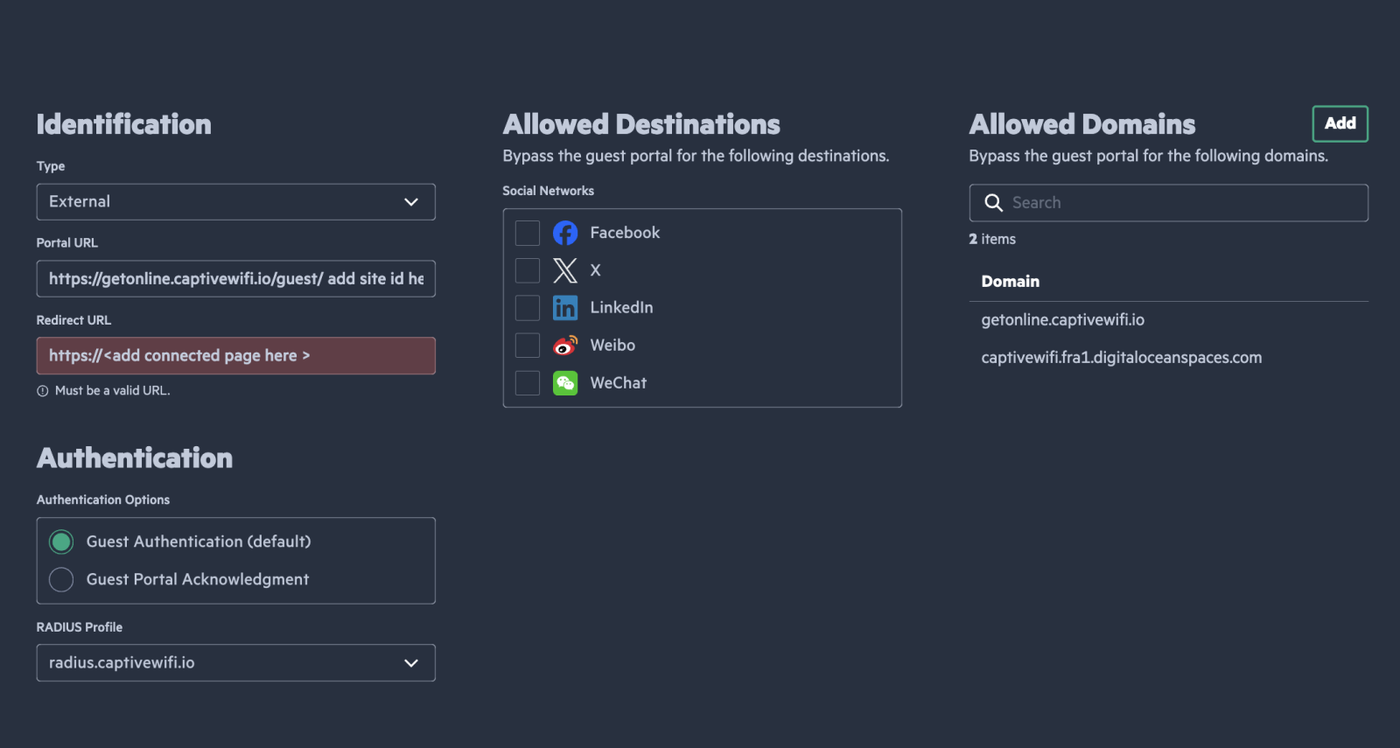
- Portal URL: https://getonline.captivewifi.io/guest/*SiteID* (Locate your specific ID here)
- Ensure to add a / at the end of the URL to avoid any errors
- Redirect URL: Please ask your account manager for this URL
- Allowed domains:
- getonline.captivewifi.io
- captivewifi.fra1.digitaloceanspaces.com
- captivewifi.io
Radius Profile
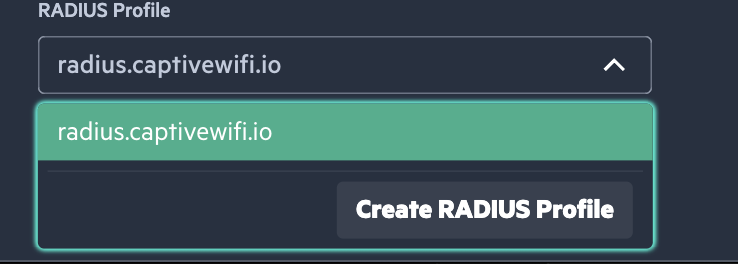
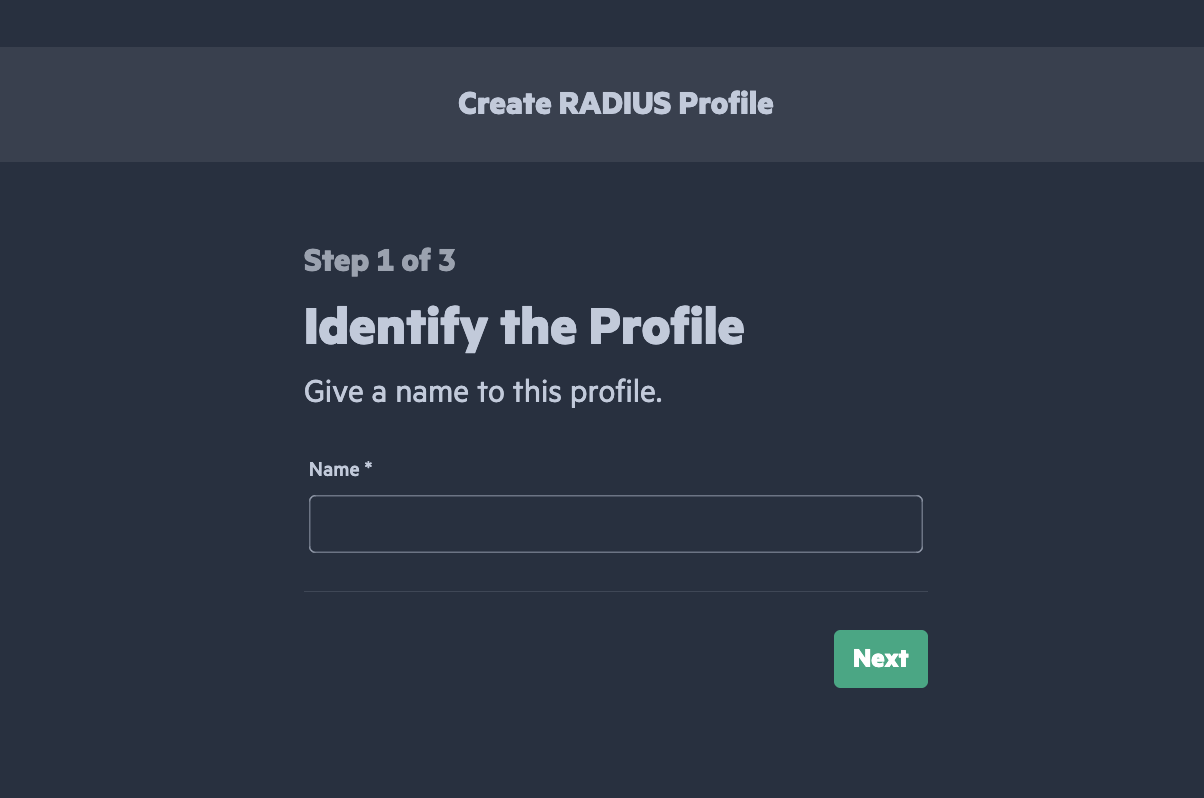
- Select Create a Radius Profile
- Choose a name ie: Captive WiFi Radius
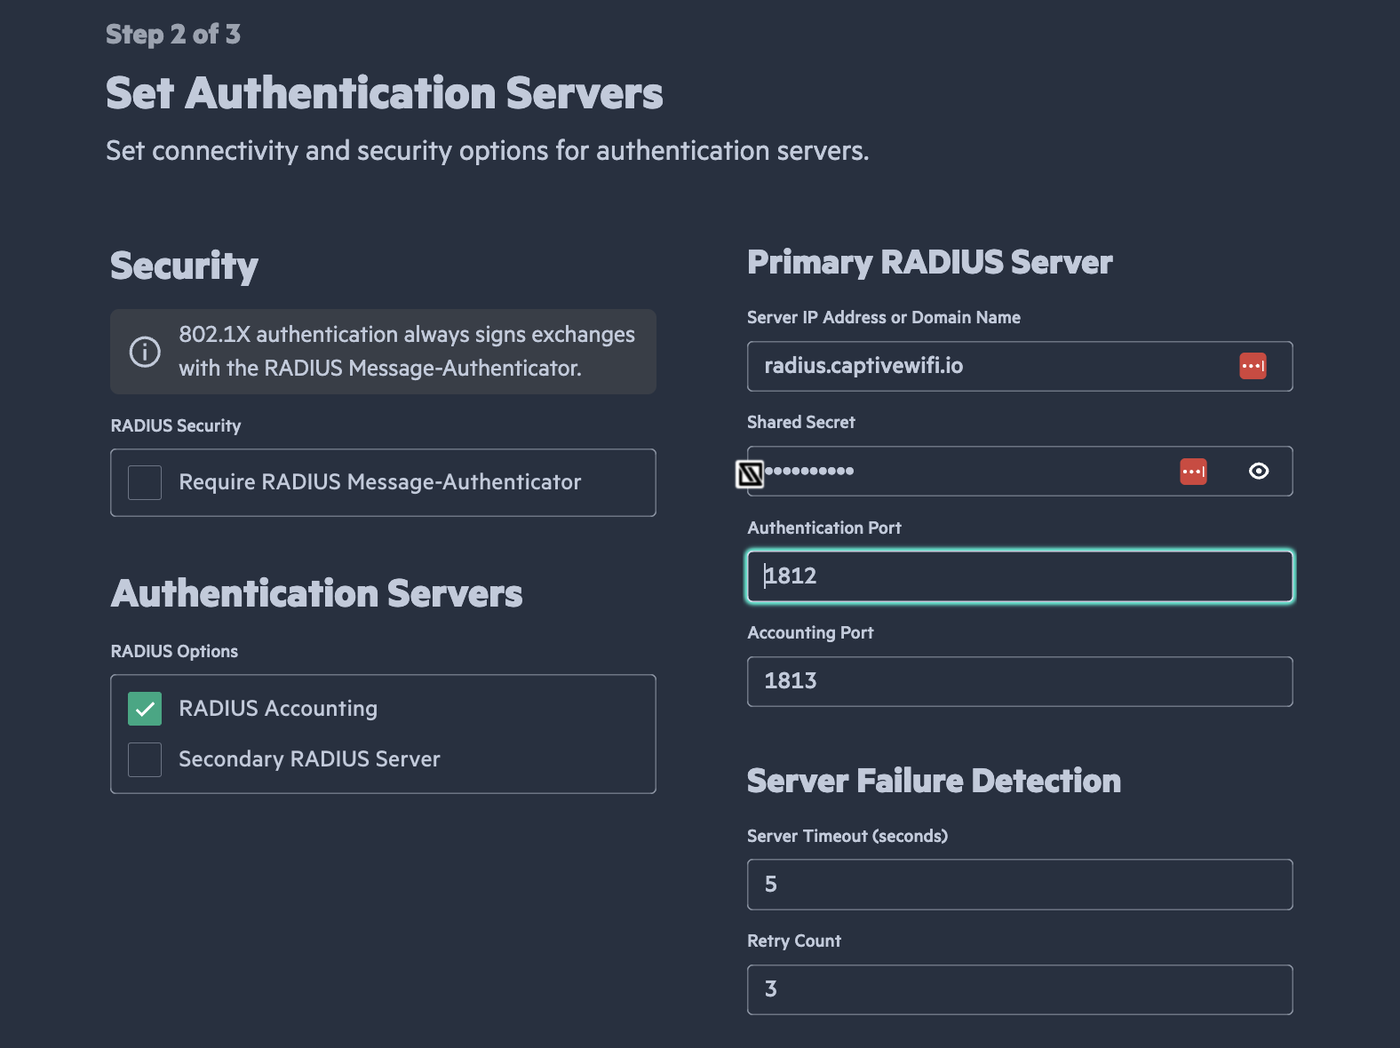
Follow the settings below
-
Require RADUS Messaging-Authenicator should NOT be selected
- Primary radius server: radius.captivewifi.io
- Shared secret: Please ask your account manager for this secret
- NAS Identifier: Use the Site ID mentioned above
- Please ensure "Use Device IP" is enabled
All remaining configurations can retain their default values.
Don't forget to hit 'Apply Changes'. And voila! You're good to go.
Adjust any other network preferences as you see fit.