Using this step-by-step guide, you will quickly be able to create or edit an existing MikroTik wireless network with Captive WiFi.
Please get in touch with your account manager for the login.html file you will need this at the end of this guide
Installing Captive WiFi on your MikroTik networks using WinBox
To get started, connect to your MikroTik management section using WinBox. Use your router IP and login details to connect.
Create a new bridge
-
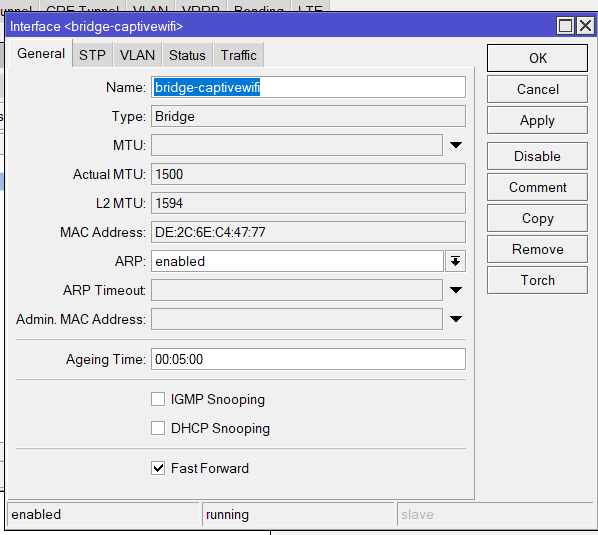
In the 'General' tab, make the following changes.
-
Name - bridge-captivewifi
-
- Choosing the relevant VLAN/LAN for your guests, select the above Bridge

- Save the changes by clicking 'OK'.
- Next, head to the Bridge > Ports > Add New tab.

In the 'General' tab, make the following changes
-
Interface - (selected interface)
-
Bridge - bridge-captivewifi
Save the changes by clicking 'OK'.
Setup the IP address for your bridge
Please skip this if you already have a guest network setup
IP > Addresses > New

Make the following changes.
-
Address - 10.5.0.1/22
-
Network - 10.5.0.0
-
Interface - bridge-captivewifi
Save the changes by clicking 'OK'.
Add an IP pool
IP > Pool > New
Please skip this if you already have a guest network setup

Make the following changes.
-
Name - pool-captivewifi
-
Addresses - 10.5.0.2-10.5.3.254
-
Next pool - none
Save the changes by clicking 'OK'.
Create a new DHCP server
IP > DHCP Server > Networks > New
Please skip this if you already have a guest network setup

Make the following changes.
-
Address - 10.5.0.0/22
-
Gateway - 10.5.0.1
-
DNS Servers - 10.5.0.1
Save the changes by clicking 'OK'.
Next, head to the IP > DHCP Server > DHCP > New tab.
Please skip this if you already have a guest network setup

In the 'Generic' tab, make the following changes.
-
Name - server1
-
Interface - bridge-captivewifi
-
Address Pool - pool-captivewifi
Save the changes by clicking 'OK'.
Create the Hotspot Profile
IP > Hotspot > Server Profiles > New

In the 'General' tab, make the following changes.
-
Name - captivewifi-profile
-
DNS Name - hotspot.captivewifi.io
-
HTML Directory - flash/hotspot

In the 'Login' tab, make the following changes.
-
Login By - HTTP PAP
Create the Hotspot User
IP > Hotspot > Users

- Click Add
- Server = All
- Name = admin
- Profile = (which ever the server name is)
Create the Hotspot User Profile

- Click Add
- Server = Default
- Pool = pool-captivewifi
- Session Timeout = 01:30:00
- Keepalive timeout = 00:02:00
- Startus Autorefresh = 00:01:00
Create the Hotspot Server
IP > Hotspot > Servers > New

Make the following changes.
-
Name - server-captivewifi
-
Interface - bridge-captivewifi
-
Address Pool - pool-captivewifi
-
Profile - captivewifi-profile
Save the changes by clicking 'OK'.
Add your login page IPs to the walled garden
IP > Hotspot > Walled Garden > New

Make the following changes.
-
Dst. Host - The domain (See below)
Save the changes by clicking 'OK'.
This step must be repeated for the following domains; you must create a walled garden entry for each. This will enable guests to access the login page before they are authorised.
Required domains
getonline.captivewifi.io
kit.fontawesome.com
captivewifi.fra1.digitaloceanspaces.com
*.captivewifi.io
You should already have the login.html, from the support team, copy the file in to the /flash/hotspot
