Before we start please ensure you have the following ready.
- Login to the Alta Dashboard
- Your AP adopted and powered on
⚡Kick things off by diving into your Alta dashboard☁️
Ensure all APs intended for the Captive WiFi network are recognised and onboarded here.
- Once logged in to the dashboard , please click on the Settings button on the top tool bar (like below
- Then click on the WiFi menu and choose the WiFi that you are looking to use for the Captive Portal
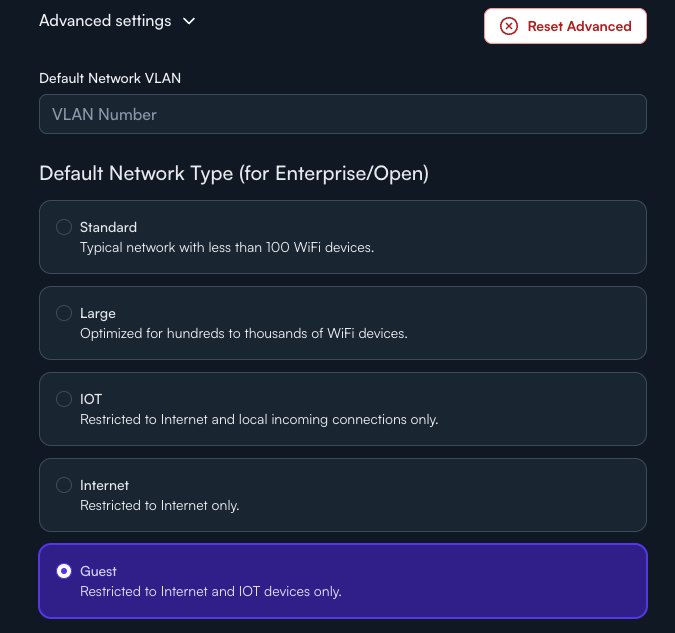
- Scroll down to Advanced Settings
- Select default network type as Guest, this will ensure all guests are restricted and isolated
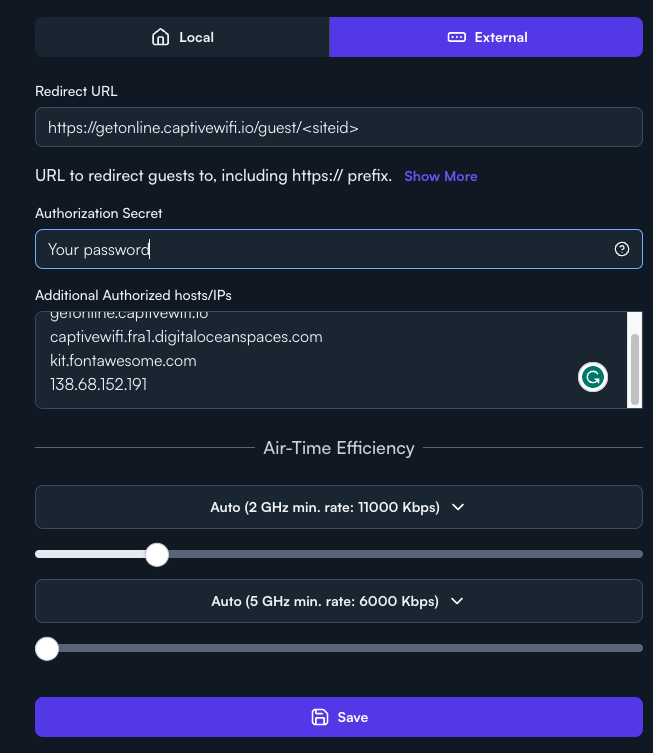
- Scroll down to Hotspot and choose External
- In the redirect URL please paste the following link https://getonline.captivewifi.io/guest/ and enter your Site ID that can be found in the Captive WiFi dashboard under WiFi Hardware
- Enter in the Authorization Secret you set in the Captive WiFI dashboard
- Next let's add the Additional Authorized Hosts / IPs as shown below.
- getonline.captivewifi.io
- captivewifi.fra1.digitaloceanspaces.com
- kit.fontawesome.com
- 138.68.152.191
- Now press Save and test the WiFi Splash page
- Please note the current Alta version doesn't allow capturing the client's Mac address, this is coming in a further release , recognising users and the welcome back feature will be enabled once this feature is released.


