Login to your Cisco Meraki Dashboard by clicking here
Select "Wireless" and "IoT Radio Settings" as shown on the image below

Select "Bluetooth Scanning" and move the toggle to "On"

Select the MQTT Tab and switch "MQTT telemetry streaming" to "Enabled"

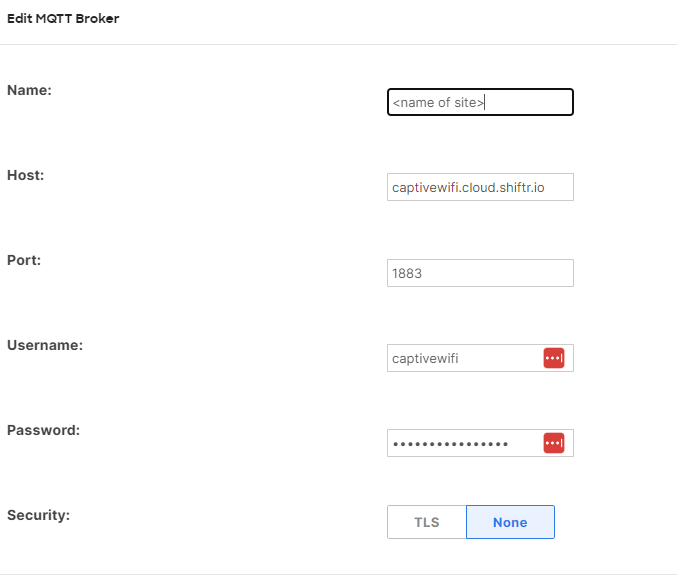
Click "Edit Brokers" and select "New MQTT Broker"
Please contact hello@captivewifi.io to request these details
The data will look similar to the below. Please ensure the port is 1883 and TLS is off.

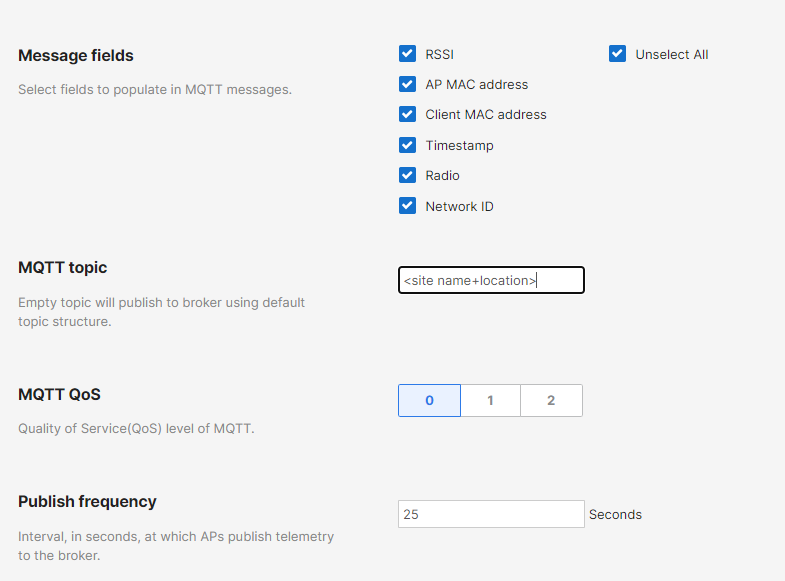
Ensure the following "Message fields" are selected RSSI, AP Mac Address, Client Mac Address, Timestamp, Radio, Network ID
Select "MQTT QoS" to 0
The Publish Frequency should be set to 25 seconds.
MQTT Topic should be the name you shared in email to our team above, usually site name, this needs to be correct to allow the footfall integration to feed the data in to our platform.

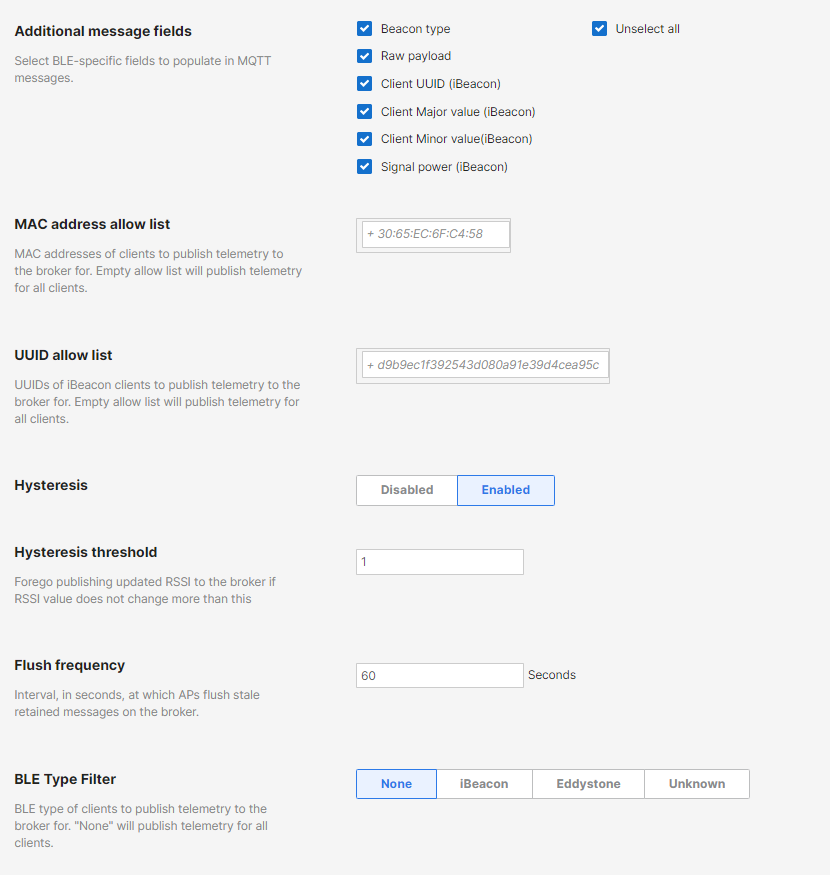
Select "Bluetooth Telemetry" and Select "Enabled"
Duplicate the settings below

Ensure "WiFi Telemetry" is Disabled
Press "Save"
Now visit the Captive WiFi Dashboard
Scroll to Manage Venue > Integrations
IOT ID please type in the Site Name in Meraki

